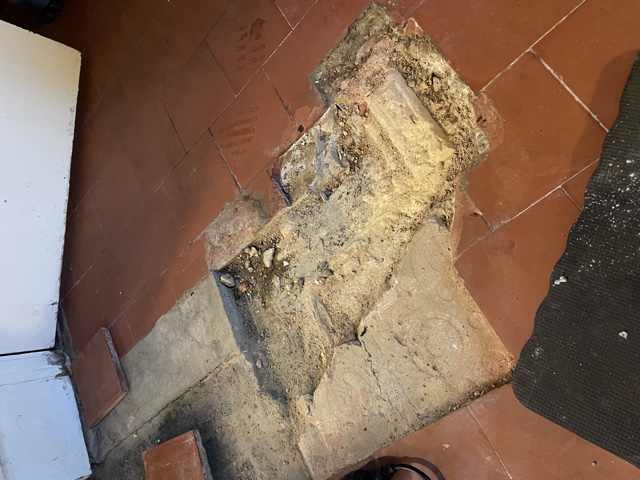
The owner of this property in the South London suburb of Cheam got in touch about restoring a Quarry tiled floor that had been covered with Vinyl tiles. After surveying the floor, it became clear that some of the original Quarry tiled floor was missing and had been replaced with concrete before covering with Vinyl.
 |
 |
To fully restore the Quarry tiles floor, it would therefore be necessary to dig out the concrete sections and tile with matching quarry tiles which had been supplied by the client. Once done we would then need to renovate both the old and the new sections of floor and seal them to achieve a consistent appearance. I was also asked to dig out an old matwell and prepare it for a new mat as part of the work.
This was a large job, but following a site visit I was able to provide my client with an accurate price and arranged a time to carry the work out which would take five days.
Removing Vinyl Tiles
The first part of the job was to lift the existing Vinyl tiles which had been laid on top of the Quarry tiles. I used a heat gun to help loosen the adhesive and then assisted with a steamer scrubbed Tile Doctor HBU Nanotech stripper into the floor to remove the glue and bitumen from the surface of the newly exposed Quarry tiles.
 |
 |
Restoring the Appearance of a Quarry Tiled Floor
The soiled solution was extracted with a wet vacuum and I followed up by giving the Quarry tiles an acid rinse using Tile Doctor Acid Gel. The Gel is applied to the tiles and then scrubbed in with a Black pad fitted to a rotary machine. This process removes old traces of cement and grout from the quarry tiles and further cleans them up. After this the floor was rinsed thoroughly and the soil extracted with a wet vacuum.
 |
 |
The next focus was on digging out the concrete areas mentioned earlier and then preparing the subfloor for tiling with self-levelling compound, which of course needs time to set. Once ready the replacement tiles were fixed in place making cuts as necessary and placing them to follow the original floor pattern. This may sound quite this sound straight forward, but this part of the job took some time to complete. The floor was left for a couple of days so the new tiles could set and the whole area could dry out before sealing.

Sealing a Quarry Tiled Hallway Floor
I returned later to seal all the Quarry tiles with Tile Doctor Colour Grow which brings out the deep Orange colours in the tiles whilst adding protection from staining and ingrained dirt. This sealer works by occupying the pores in the tile so dirt cannot become ingrained there. Four coats of sealer where applied across the whole floor leaving a nice matt finish that was consistent across the whole floor.
 |
 |
Before leaving I discussed with the client the best way to maintain the floor in the future and recommended the use of Tile Doctor Neutral Tile Cleaner which is a pH neutral cleaner. This is important as its gentle enough to use frequently and won’t strip off the newly applied sealer like many household floor cleaners will. Its supplied in concentrated form so a small amount of cleaner goes a long way.
The client was delighted with the results, they were very pleased to see the back of the tired Vinyl floor and pleased the floor now looked consistent throughout.

Source: Quarry Tile Cleaning and Restoration Service in Cheam, South London
Tile Doctor has a range of sealers that cover all types of finish and situations. If your not sure which product is best for your Floor do call our helpline on 0345 512 0122 to discuss.